


开发环境配置
electron基于node.js,所以首先得安装node,开发工具我们选择vscode,vscode就是基于electron开发的哦。
安装node
node的安装很简单,这里就不讲了。主要注意的是使用国内镜像,命令如下
npm config set registry https://registry.npm.taobao.org或者安装cnpm
npm install -g cnpm --registry=http://registry.npm.taobao.org或者安装nrm,nrm可以用于管理代理镜像,可以手动选择国内镜像
sudo cnpm install nrm -g

nrm ls

  npm ---------- https://registry.npmjs.org/
  yarn --------- https://registry.yarnpkg.com/
  tencent ------ https://mirrors.cloud.tencent.com/npm/
  cnpm --------- https://r.cnpmjs.org/
  taobao ------- https://registry.npmmirror.com/
  npmMirror ---- https://skimdb.npmjs.com/registry/

nrm use taobao

SUCCESS  The registry has been changed to 'taobao'.
安装vscode
这个就不用多讲了。
新建electron项目
新建一个项目目录,例如electron_demo,进入该目录,运行命令
npm init

This utility will walk you through creating a package.json file.
It only covers the most common items, and tries to guess sensible defaults.

See `npm help init` for definitive documentation on these fields
and exactly what they do.

Use `npm install <pkg>` afterwards to install a package and
save it as a dependency in the package.json file.

Press ^C at any time to quit.
package name: (electron_demo)
version: (1.0.0)
description:
entry point: (index.js)
test command:
git repository:
keywords:
author:
license: (ISC)
About to write to /Users/menglikun/git/electron_demo/package.json:

{
  "name": "electron_demo",
  "version": "1.0.0",
  "description": "",
  "main": "index.js",
  "scripts": {
    "test": "echo \"Error: no test specified\" && exit 1"
  },
  "author": "",
  "license": "ISC"
}


Is this OK? (yes)
运行以上命令后,项目目录下会多出一个package.json文件,文件内容如下
{
  "name": "electron_demo",
  "version": "1.0.0",
  "description": "",
  "main": "index.js",
  "scripts": {
    "test": "echo \"Error: no test specified\" && exit 1"
  },
  "author": "mlk",
  "license": "ISC"
}
package.json称之为包描述文件或者包说明文件,在项目中一般会创建package.json文件
接着安装electron
npm install --save-dev electron安装完之后,会在目录下多出一个package-lock.json文件和node_modules目录。
package-lock.json 是在 npm install 时候生成的一份文件,用以记录当前状态下实际安装的各个 npm package 的具体来源和版本号。package-lock.json 文件的作用锁定安装时的包的版本号,并且需要上传到 git,以保证其他人在 npm install 时大家的依赖能保证一致。
接着打开package.json文件,在scripts部分加入如下代码
{
  "scripts": {
    "start": "electron ."
  }
}
这时候我们运行以下命令就可以启动electron程序了
npm start但是会弹出如下的错误
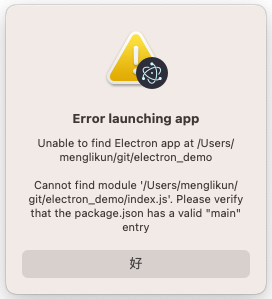
这是因为我们的项目中还没有index.js文件,不过没有关系,下一节我们会详细讲解。
简单的electron应用
ok,紧接上一节,我们在项目目录下新建一个index.html文件,内容如下:
<!DOCTYPE html>
<html>
  <head>
    <meta charset="UTF-8">
    <!-- https://developer.mozilla.org/en-US/docs/Web/HTTP/CSP -->
    <meta http-equiv="Content-Security-Policy" content="default-src 'self'; script-src 'self'">
    <title>Hello World!</title>
  </head>
  <body>
    <h1>Hello World!</h1>
    We are using Node.js <span id="node-version"></span>,
    Chromium <span id="chrome-version"></span>,
    and Electron <span id="electron-version"></span>.
  </body>
</html>
然后再新建一个index.js文件,内容如下:
//导入electron
const { app, BrowserWindow } = require('electron')
//创建window
const createWindow = () => {
const win = new BrowserWindow({
width: 800,
height: 600
})
win.loadFile('index.html')
}
//准备好之后,显示window
app.whenReady().then(() => {
createWindow()
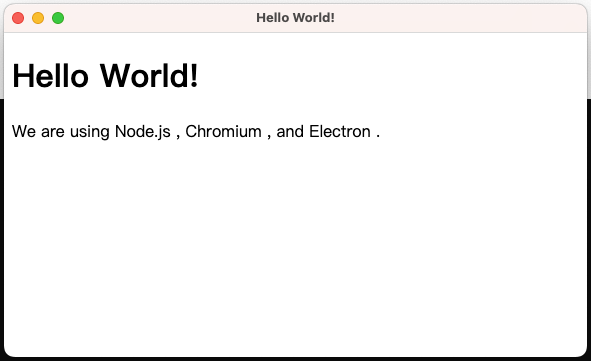
})这时候我们再运行npm start命令,一个简单的桌面窗口就显示出来了
做个简单的优化,代码如下
const { app, BrowserWindow } = require('electron')

const createWindow = () => {
    const win = new BrowserWindow({
        width: 800,
        height: 600
    })

    win.loadFile('index.html')
}

app.whenReady().then(() => {
    createWindow()
    //macOS
    app.on('activate', () => {
        if (BrowserWindow.getAllWindows().length === 0) createWindow()
    })
})

//window&linux
app.on('window-all-closed', () => {
    if (process.platform !== 'darwin') app.quit()
})
具体可以看electron的官方文档。
生成可执行程序
生成可执行程序最快捷的方式是使用Electron Forge.
先安装Electron Forge
npm install --save-dev @electron-forge/cli
npx electron-forge import

up to date in 4s
✔ Checking your system
✔ Locating importable project
✔ Processing configuration and dependencies
  ✔ Installing dependencies
  ✔ Copying base template Forge configuration
  ✔ Fixing .gitignore
✔ Finalizing import

› We have attempted to convert your app to be in a format that Electron Forge understands.
  Thanks for using Electron Forge!
运行以上命令后,在package.json文件中会添加一个新的依赖
"devDependencies": {
    "@electron-forge/cli": "^6.3.0",
    ......
}
这里“^6.3.0”中的有个“^”符号,此符号的含义为:安装此依赖时允许次版本号和修订版本号提升,但不允许主版本号提升。也就是说可能安装的是6.3.5版本,但是不能是7.0.1版本。另外,如果版本号前面的符号不是“^”而是“~”,这种情况下则只允许修订版本号提升,主版本号和次版本号均不允许提升。如果主版本号为0或主版本号和次版本号均为0,以上规则则应另当别论。
然后在项目目录中运行以下命令即可生成对应平台的可执行程序了
npm run make
评论区